There are a few occasions in which you will need to remove the gas cylinder from your office chair. If the gas lift no longer holds your weight, or it doesn’t function as it should anymore, you will need to replace it.
Before replacing your gas cylinder, it is good to thoroughly test it first. This is to ensure that you won’t be throwing away a good gas cylinder.
Table of Contents
Testing Your Gas Cylinder
If your gas cylinder sinks all the way to the bottom when you sit, try adjusting your lever. It is possible that the lever is too tight that it presses on the lock even when you are not touching it.
If that is not the case, try tightening the screws on your gas cylinder. Loose screws will not allow enough pressure to stay inside the cylinder.
If your problem is that the cylinder won’t sink down when you press the lever, you may want to check if the lever is working properly. You will also want to check the lock on your cylinder head to make sure it’s functioning.
If you’re still experiencing problems after testing your gas cylinder, you can then proceed to remove and replace it.
Removing Your Gas Cylinder
Removing the gas cylinder from your office chair is a simple task that can be done using just a handful of tools.
The tools you will need are an adjustable wrench to remove the four bolts, a screwdriver to remove additional locks, and a rubber mallet .
The first step is to remove the casters, or wheels, from the base of your chair. To do this, you simply need to pull each one out by hand. If they are stuck, you can use the rubber mallet to gently tap them downward until they come off.
Removing the casters is not required to remove your gas cylinder but it makes the process safer.
The next step is to unscrew the four bolts that connect the top of the chair to the mechanism under it.
You can turn the chair upside down to get a better angle with your wrench. Make sure you do this on a smooth surface so you won’t scratch up your chair’s cushions.
Once all four bolts are unscrewed, take the top part of the chair and set it aside.
The next step will remove the base of the chair from the cylinder.
Take the cylinder with one hand and hold it upright. Using your other hand, gently tap the base downward with your rubber mallet. Go around the entire base tapping it as close to the cylinder as possible.
When the base comes off, you can then proceed to remove the mechanism from the cylinder.
The process is similar to removing the base. Take the cylinder with one hand and hold it upside down this time. Then, using your free hand, gently tap the mechanism downward with your rubber mallet.
Removing the mechanism from the cylinder is usually more difficult than removing the base. If the mechanism seems stuck, you can try applying some heat before continuing to tap it with your rubber mallet.
Use a torch or hold it over a stovetop. Be very careful when applying heat to the mechanism.
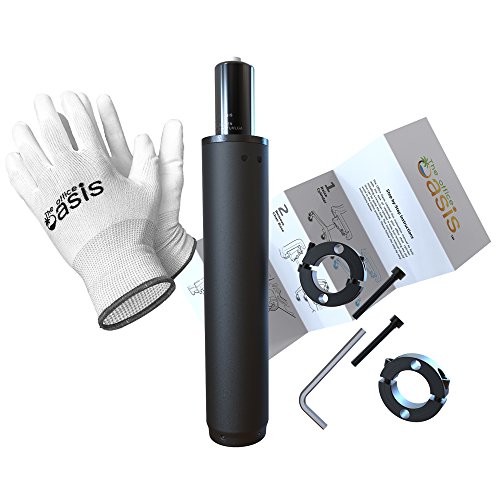
If you’re still having trouble removing the mechanism. You can use a removal tool that usually comes with replacement gas cylinders. Check out this replacement gas cylinder that comes with a special removal tool.
Related post: Can Office Chairs Explode?
Replacing The Gas Cylinder
So you’ve successfully removed the gas cylinder from your office chair…
…what should you do next?
The next step is to find a replacement gas cylinder that will work perfectly with your office chair and put everything back together.
Let us now take a closer look at how to do just that.
Choosing the Right Gas Cylinder Replacement
Finding a replacement gas cylinder for your office chair shouldn’t be difficult. This is because most office chairs today use the same standard gas cylinder.
But to be sure that you won’t be buying something you can’t use, it’s a good idea to take some measurements first.
There are three important measurements you need to make to ensure that you get the correct replacement gas cylinder.
1. Gas Spring Diameter
The first one is the diameter of the gas spring.
The gas spring is the top portion of your cylinder. At the tip of this spring is where your release button is located.
The standard measurement of a gas spring is 1.1 inches in diameter.
2. Column Diameter
The next thing you need to measure is the diameter of your gas cylinder column.
The column is the bottom part of your gas cylinder. This usually slightly protrudes from the bottom of your chair’s 5-star base.
The standard measurement for the column is 2 inches in diameter.
If yours has a different size, don’t fret! We’re sure you’re still going to find one that will fit your office chair.
3. Gas Cylinder Stroke
The final measurement you need to make is the stroke of your gas cylinder.
Your gas cylinder stroke is the distance your chair can move from its lowest position to its highest position.
A 4-inch stroke gas cylinder means that your chair can be adjusted 4 inches up from its lowest position.
Our recommendation is this 5-stroke gas cylinder by Oak Leaf. It is a high-quality gas cylinder that can hold up to 450lb of weight and fits most office chairs.
Installing Replacement Gas Cylinder
When you get a hold of your new replacement gas cylinder, the next step will be to install it.
The good news is that installing a replacement gas cylinder is much simpler than removing the old one.
Let’s take a look at the steps to install your replacement gas cylinder.
Step 1: Preparation
When you get your new gas cylinder, it’s going to come all wrapped up.
You need to carefully remove all protective wrappings so they don’t get stuck when you put your chair back together.
This will also be a rare opportunity to clean the mechanism and base sockets on your office chair. Remove any dirt that might cause trouble when you try inserting the new gas cylinder.
Step 2: Installing the Gas Cylinder
Insert the gas spring into the socket on your office chair mechanism. Give it a firm push to secure it in place.
Hammering it in with a mallet is unnecessary. This is because your body weight is going to push down on it further when you sit on the chair.
Now insert the other end into the socket on your wheelbase. You can give it a few taps with your rubber mallet until it’s nice and tight.
If your gas cylinder comes with washers or bearings, don’t forget to install these with your gas cylinder.
Also, if your gas cylinder has a pin at the bottom of the column, you will need to fasten the pin with the help of a screwdriver.
Step 3: Reassembling Your Office Chair
After installing your new gas cylinder, the next step would be to put all the other pieces of your office chair back together.
You can start with the casters. Firmly push each caster into the five caster sockets on your wheelbase.
If any of your casters do not fit tightly, you can refer to our article on How to Fix Office Chair Wheels that Keep Falling Off.
When the casters are installed, the last step would be the seat.
Alight the holes on your seat with the four bolt holes on your mechanism.
Insert the bolts one by one and tighten them using a wrench.
After that, you’ll be all done!
Conclusion
We hope this article has been helpful to you! Remember that removing your gas cylinder from your office chair is not as difficult as it may seem.
You only need a handful of tools and a little bit of time. Just make sure to do everything slowly and carefully so you won’t damage any of your chair’s other components.

My name is Vance, and I am the owner of To Ergonomics. Our mission is to improve your workflow by helping you create a supportive and welcoming environment. We hope that you’ll find what you’re looking for while you’re here.


