If you are planning to start a new exercise routine, your first stop is likely the local sporting goods store where you’ll purchase an exercise ball. These may sometimes be called yoga balls or stability balls.
Regardless of the name, they serve as valuable tools for strength training and rehabilitation. One potential issue with stability balls is that since they are inflatable, they can be prone to being punctured from normal use, handling, and storage.
Over time, you may start to notice your ball becoming slightly deflated. This can happen due to the rising and lowering air pressure in the room around you, or from a small puncture hole in the ball.
If you think your exercise ball may have a puncture, be sure to try and patch the hole before going out and buying a new one. Locating the small leak and patching the hole is easier than you think!
Table of Contents
How To Find A Leak In An Exercise Ball
If you notice your exercise ball slowly deflating over time, it may be due to a tiny hole slowly but steadily releasing air.
It’s also not uncommon for an exercise ball to seem like it may have a leak, even when it doesn’t. Over time, the rubber exterior of the exercise ball can stretch making it seem like you are losing air.
Additionally, changes in air pressure due to climate can have an effect on the inflation level of your exercise ball.
The safest temperature range for using an exercise ball is between 65°F (18° C) and 90°F (32° C). Temps that are higher or lower than that may lead you to over-inflate your ball causing damage to the valve or seams.

If temperatures are right and you know your ball has been inflated properly, noticing a leak may be as simple as feeling a different sitting position when you use the ball, or not getting as much resistance from it during your exercise routine.
Locating the hole may take a few minutes of your time, but if you are able to locate it and get it patched, it will save you the cost of having to purchase an entirely new exercise ball.
- Step 1: Inflate your ball fully. Having the ball at full air capacity will encourage the air to leak out through the puncture hole. This will make it easier for you to locate the leak.

- Step 2: Fill a large bowl or your bathtub with water. You will need to wet the entire surface of the exercise ball in order to find the leak. This is easiest when using the bathtub, but a large bowl outdoors works fine as well.
- Step 3: Add a small amount of soap to the water. Having soap in the water will encourage bubbles to form where the leak is. Normal water works too, but having soap in it will make the bubbles last longer and become more visible.
- Step 4: Pour water on the ball, or place it in your bathtub. As you get the surface of the ball wet, squeeze it with steady pressure to encourage air to leak. Be sure to pour water on all surfaces of the ball, including around the seams and the inflation valve.
- Step 5: Check for bubbles on the surface of the ball. If you find bubbles, you have found the leak. Even the tiniest leak will cause some bubbles, but they may be tiny so be sure to look closely.
- Step 6: Circle the area where you notice bubbles. Using a permanent marker or grease pen is a good way to keep track of the hole. Try to use some kind of mark that will not rub off when you dry the ball.
- Step 7: If you’re confident you found the only leak in the ball, it’s time to remove the ball from the water and dry it off. Use a large towel or several paper towels to thoroughly dry the exercise ball.
How Do You Fix A Punctured Exercise Ball?
Once you know the location of the leak on your exercise ball, there are simple and effective ways to fix it.
Even if you find a slow leak, you don’t always need to run out and purchase a new ball. It’s normally much cheaper to patch a small hole or leaky valve than it is to replace the ball entirely.

Before placing a patch on any part of the ball, be sure to degrease the damaged area. Grease from sweat, storage, and general use can hinder the adhesion of the patch.
In order to get a good connection between the patch and your ball, you want the damaged area to be as clean as possible.
- Step 1: Decide on a patching method. There are various choices for patches that you can use. Several stores sell patches for waterbeds, inflatable boats, or shower curtains which will work on your exercise ball as well. Additionally, duct tape can work in a pinch too!
- Step 2: Deflate the ball and follow the instructions on the patch kit you purchased to properly apply it to your ball. If you’re using duct tape instead, consider adding some cyanoacrylate or Super Glue to the duct tape for extra adhesion.
- Step 3: Let the patch or duct tape adhere to the ball for 24 hours before you attempt to inflate it again. This gives the adhesive plenty of time to properly bond with the microscopic texture of the ball’s surface.
- Step 4: After 24 hours have passed, inflate the ball to the proper size or air pressure measurement. At this time, you can either use the ball normally and see if it slowly deflates over time, or you can do the soapy water test around the patched area again to see if you notice any bubbles forming.
How Do You Know If Your Exercise Ball Has Enough Air?
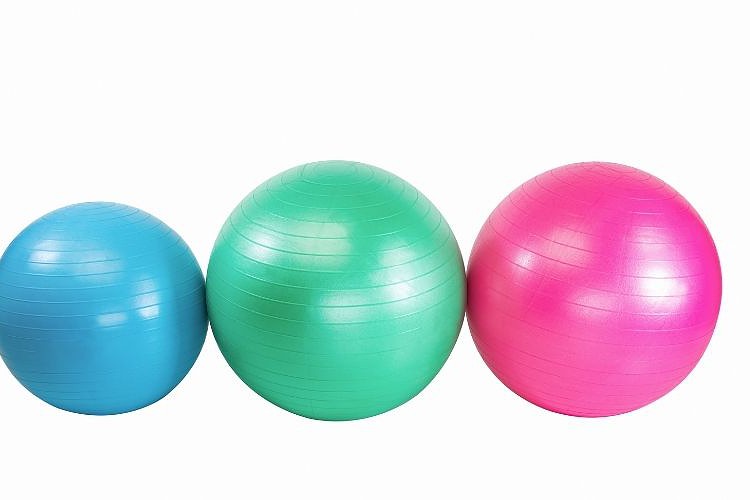
Exercise balls come in a variety of sizes, though the most common diameters are 55, 65, and 75 centimeters. Choosing the right size of ball will depend on your height as well as the exercise routine you plan on using it for.
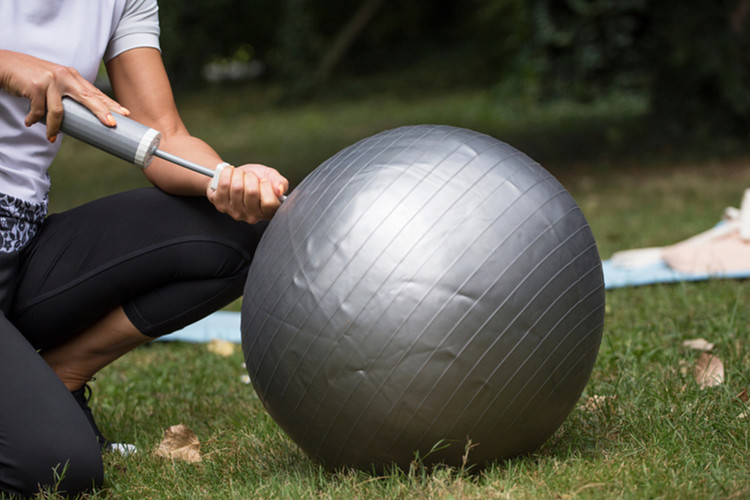
When inflating your ball, one of the easiest ways to know when you have put enough air into it is by using the measurement on the packaging. For example, if you purchased the 65cm sized ball, you can measure out a 65 centimeter or 25 inch height on the wall.
As you are inflating the ball, you can compare the ball size to the mark on the wall to know when you have reached the maximum size. You may also be able to simply use the included pamphlet that includes inflation information for the brand of exercise ball you have purchased.
Over-inflating the ball can make it more prone to bursting once you start putting your weight on it, so always be sure to keep your ball as close as possible to its measured size.
Once the ball is properly inflated, sit on it as you would during your exercise routine. You want it to have a little bit of give, but not so much that you are sitting uncomfortably.
Your feet should remain flat on the floor and your legs should be at a 90 degree angle when bent at the knee. This puts your body in an ergonomic and comfortable position.
Why Does My Exercise Ball Keep Deflating?
Since some exercise balls are made up of multiple rubber panels stitched together, there are a few different areas it can fail and start to leak from. The most common culprit for a leak is around the inflation valve. Normally this is where you would secure the pump when you are inflating the ball, and is also where the air will escape when you intentionally deflate it for storage.
In some cases, the valve can become faulty over time or from poor manufacturing processes, leading to a slow but steady leak. Replacing the valve itself is normally not possible, but patching the seams around a valve can be done.
The seams of the exercise ball can be another trouble spot. Since most exercise balls are made from multiple pieces of rubber or plastic secured together, these seams can be prone to leaking. Seams can tear if you overinflate the ball, or if you use it improperly.
When storing your exercise ball, it’s important to deflate it fully before doing so. This releases the pressure from the ball and allows the seams, valve, and exterior surfaces to rest.
If you store your exercise ball without deflating it, this constant stress can slowly pull the seams apart leading to gradual air loss.
Final Thoughts

Ensuring your exercise ball is properly inflated is important for a proper workout, but over time you may start to notice the ball becoming smaller.
While some minor deflation is normal due to changes in temperature, air pressure, and general use, you may need to consider patching a hole if deflation becomes too rapid.
Tiny punctures in your exercise ball can happen over time or from poor manufacturing processes. Your first step is to locate the leak using soapy water, then patching it with a kit or duct tape.
Patching a hole is a relatively simple and straightforward process, and can end up saving you money over replacing the ball entirely. You may even want to have an extra patch kit or two on hand in case of future leaks or puncture holes.

My name is Vance, and I am the owner of To Ergonomics. Our mission is to improve your workflow by helping you create a supportive and welcoming environment. We hope that you’ll find what you’re looking for while you’re here.
Leave a comment